

In creating my puppets, I had planned to refer to several books on my shelf; I own a small library of books on the topic of building puppets and also a couple of books on making Waldorf dolls, but none of my books offered much help when it came to creating a glove-puppet with a Waldorf style doll-head. When making a glove-puppet, it is usual to have space inside the head for the fingers of the puppeteer; however, on a traditional Waldorf doll-head, it would be very difficult to create a space inside the head. This left me with a bit of a problem - I now had to design a pattern for a glove-puppet from scratch.

I sewed test patterns from muslin and then proceeded to cut up precious pieces of vintage velvet which had been hoarded for many years in my fabric-stash, only to discover that my patterns were flawed. Back to the drawing board, and on to using revised patterns to cut the next series of puppet-bodies from some lovely brown velour... only to discover that my pattern was still not quite right! Luckily, I was able to buy more brown velour to use when I finally perfected the pattern!
In this tutorial, I will give you guidelines for creating your own pattern, however, I strongly recommend that you create puppet bodies from muslin (or some other scrap fabric such as an old t-shirt) to test your pattern before you cut your puppet-body pieces from fine cloth.
MAKING THE HEAD
There are several good books on making Waldorf doll heads, including one titled Making Waldorf Dolls published by Hawthorn Press. Additionally, you can find excellent instructions on the blog Doing Without. Below, I offer a very basic outline of instructions, however, if you've never made a Waldorf doll-head, I suggest you refer to secondary resources for more specific information.
Most Waldorf doll-making instructions tell you to start off with tubular gauze. In the United States, tubular gauze is only available via mail-order; not having any on hand, and wanting better control over the size of my doll-head anyhow, I sewed a tube using fabric from an old, cotton t-shirt. Knowing I wanted my head to be about 4 1/2 cm wide and approx. 5 1/2 or 6 cm high, I cut the width of my fabric about 13 1/2 cm wide, folded it and sewed it into a tube. Then I made a tight gather at the top, turned it inside-out, stuffed it firmly (so the height was approx. 6 cm), and tied it off at the bottom.

To create the eyeline, I took heavy cotton thread, wrapped it a few times horizontally around the center of the head, made a few vertical wraps and then tied off the string. To secure the string, I sewed an "X" where the horizontal and vertical wrappings crossed on both sides, then pulled down the horizontal crossing at the back to get the correct shape to the head.

To make a nose, I stitched round and round, just beneath the eyeline, catching bits of stuffing as I went along, pulling tight until I had a small raised area. To firm-up the nose of my puppet-head, I smeared on a good layer of white-glue and allowed it to dry.

Many years ago, I bought two yards of mini-ribbed cotton fabric and dyed it a rosy-tan color. I was glad to have it in my stash and used this bounty to cover my puppet-heads. Before I sewed on the face, I decided on eye and mouth placement by inserting pins into the head (the eyes go right on the eyeline.)

Then, inspired to try something new, I also created a Mother Earth puppet with a head from felt. You will notice, in the pattern I drew, that the neck is quite wide; I had planned to construct the puppet so that my fingers could fit up inside the head, but changed my mind; The neck on my puppet head is narrower and accommodates my fingers going up behind the head inside a pocket, as you will see below when I describe construction of the puppet bodies.
Anyhow, to create this type of head from felt, you will need to draw a head with a face in profile and cut 2 pieces. You will also need to cut one gusset-piece to go up the back of the head. I do not show it in a photo, however, I sewed a test pattern from scrap-felt to make sure the size and shape of the head was correct. My first version was too small, so I enlarged the pattern slightly and then proceeded to use the corrected version of my pattern to cut my peach-colored wool felt.

Here you can see the top of the head where the gusset meets the side-pieces. I have also embroidered eyes and a mouth. The cheeks are made pink by applying red wax crayon.
MAKING THE BODY

Here is a drawing of the basic pattern I created for my puppets (both the Root Children and Mother Earth.) You will need to cut two of these. There is a 1/2 cm seam allowance built into the pattern -- and, please know that the whole thing is sized generously. I have given measurements, however, this is not rocket-science... if your pattern does not exactly match mine, don't worry. Just keep in mind that it's always better to cut a little larger than you will need. If your puppet-body is too small, it might not fit, however, if it's too large, you can always make it a bit smaller.
Measurements:
The portion at the top, extending up from the neck, will form a pocket at the back of the puppet's head to accommodate your fingers. It is 7 1/2 cm wide.
At the widest point, the arms measure 21 1/2 cm.
The widest point of the body should measure approx. 19 1/2 cm.
The height of the entire pattern should measure approx. 30 1/2 cm (or taller.)

After I cut two body pattern pieces, I took one of the pieces and removed the tall portion from above the neck (this is marked by a dotted line in the pattern photo.) This tall portion above the neck is needed to form a pocket at the back of the head (to accommodate the fingers of the puppeteer); however, this flap of fabric is not needed on the front of the puppet!

Next, I pulled out my stash of knit cotton (which I had used to cover the puppet head) and cut 4 hand pieces per puppet. To make a pattern for the hand pieces, I matched the width of the hand-pattern to the width of the arm opening of the body. My hand patterns are approx. 4 cm wide and 4 1/2 cm tall.
You will also notice, in the photo above, that I finished off the puppet head by removing most of the fabric which had been hanging off the bottom of the head. I left approx. 2-3 cm of fabric, folded it toward the back and carefully sewed it down.

Then I pinned the hands onto the right-sides of puppet body pieces and sewed them in place.


Next, I matched up the hands, front to back, pinned the sides of the bodies together (front to back) and sewed down each side from the neck, around the hand and down to the bottom edge.
Note: I left 1/2 cm at the top of the neck unsewn. This allowed me to roll the fabric under when I pinned & sewed the front of the body to the head.

For me, attaching the head of the puppet to the body is always the best part, because, after this is done, I can put my hand inside and make the puppet wave hello. That first hello is always very sweet and magical. This is what I love most about glove puppets -- their expressiveness -- their ability to wave hello, nod their heads, play peek-a-boo, clap their hands and then take a bow...
To attach the head, I pinned the front of the neck (where I had removed the tall flap of fabric) beneath the face and then sewed the pocket-flap to the back of the head.

The pocket flap is not intended to be sewn down flat against the head. It should be raised in the back to form a roomy pocket for your finger(s). I had intended it to fit 2 fingers, however, I actually find it most comfortable to control this puppet with my index finger up behind the head, my thumb controlling one of the hands and my middle finger controlling the other hand.
Note: I did not sew down the top of the pocket at the back of the head. Leaving the top of the pocket open left a little more room for my finger(s), and, because I have covered the heads of my Root Child puppets with stretchy knit hats, this works out just fine. According to your preferences, you may or may not want to sew the top of the pocket shut.
COSTUMING THE PUPPETS
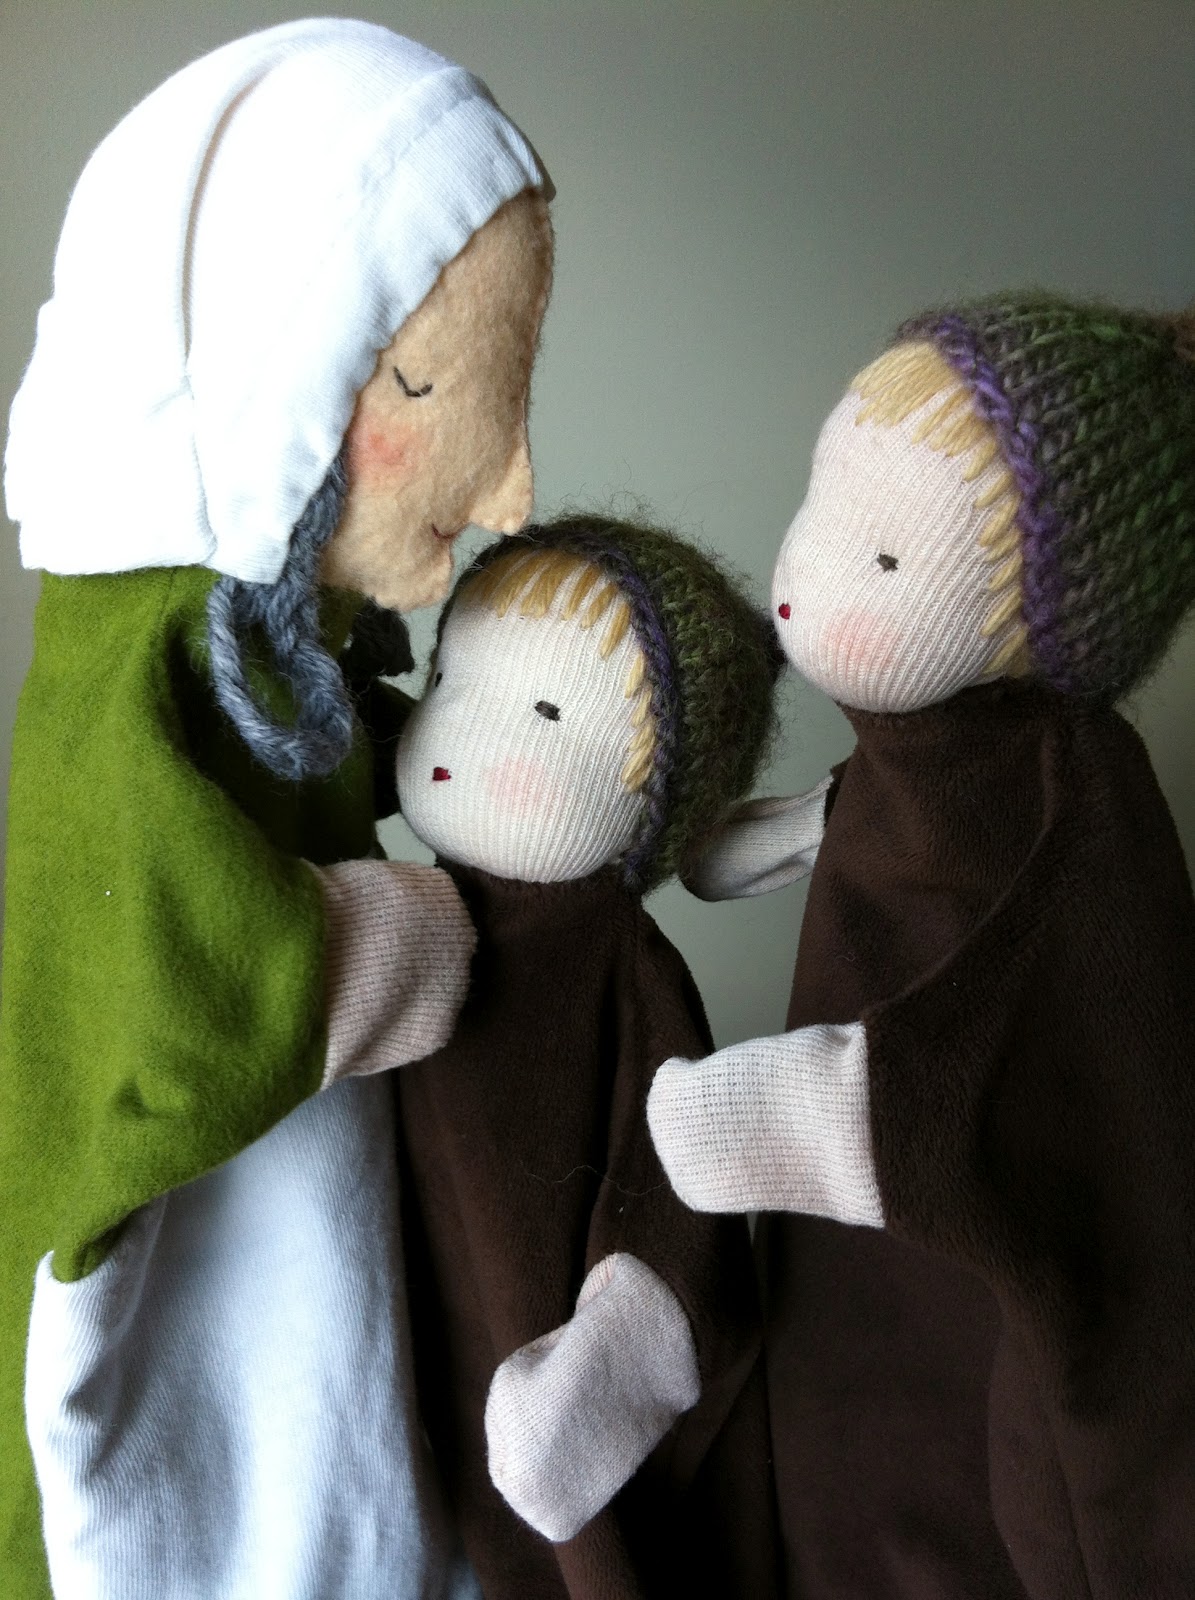 |
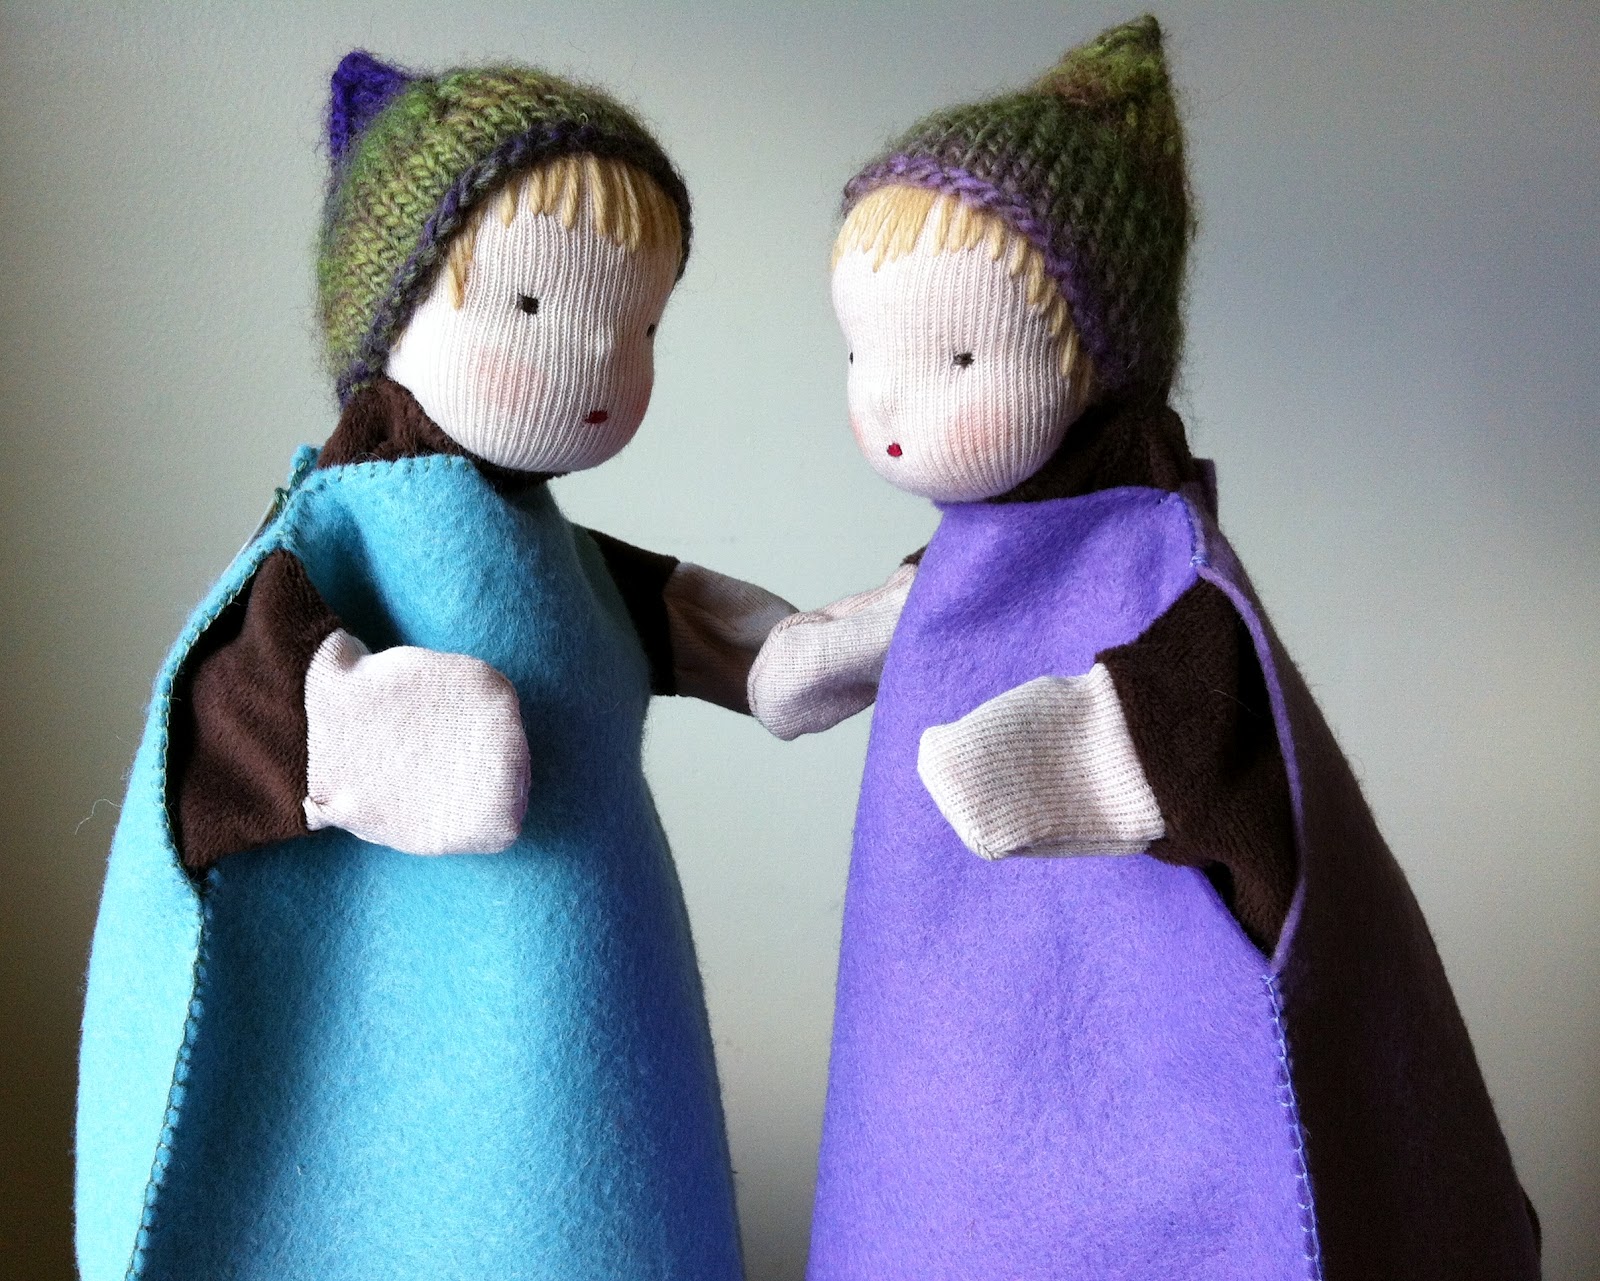
| The Root Children, newly awoken, dressed in their brown, root gowns |
 |
| Root Child glove-puppet by Melissa |
I also stitched up flower-petal pinafores from wool felt to garb my Root Children for their Spring and Summertime festivities. I hope you have fun, too, coming up with your own original costuming ideas and designs.
 |
| Mother Earth glove-puppet by Melissa |
RESOURCES FOR PURCHASING SUPPLIES
U.S.A
Canada
Australia
 |
| Mother Earth glove-puppet by Jen of SEWNnatural |
 |
| Tiptoes Lightly marionette by Rhonda of Joy Grows |
 |
| Mother Earth glove-puppet with a knit body by Melissa |
And now, dear Readers, a public service announcement: Did you know that, even if
you "Like" we bloom here and/or Making Peg Dolls
on Facebook, you may not be seeing updates and messages from me in your
Facebook feed? Did you know that you might be missing tutorials for
lovely, quick-to-whip-up gifts? Missing information about the upcoming
blog tour? About book give-aways, and other give-aways?
Here's what you can do so you don't miss anything: once you’ve liked the we bloom here and/or the Making Peg Dolls page (thank you!), use the dropdown menu right under the “liked”
button to select “get notifications.” This lets Facebook know, going
forward, that you really do want to know when I've posted a new tutorial, give-away, and other assorted nonsense.
Another
way you can hear from me is to have a look at the right-hand sidebar of
this blog, and find the widget which allows you to "follow by email."
Once you've typed in your email, you will get notifications delivered
directly to your inbox. I don't have access to information about who
signs up for email through my blog, so there is no way I could add you
to some list and send you junk-mail (not that I would ever consider
doing such an annoying thing anyhow, I promise).
Thanks for visiting! Please say "hi" any time -- I love hearing from you. xo mb
Thanks for the tutorial, I love how your puppets turned out! I would love to make these sometime, both your mother earth and root children are wonderful!
ReplyDeleteOh, these are so wonderful!! And thank you for the tutorial. :)
ReplyDeleteYour root children are simply gorgeous! Soo sweet.
ReplyDeleteGosh you are clever!
ReplyDeleteAw, how beautiful they are! I'll have to make one some day!
ReplyDeleteso amazing! my little one just made her own puppet yesterday--totally independently. it's materials aren't hard to come by, just your local bathroom! she found a fun use for a toilet paper roll...anyway, these are beautiful, maybe i should think of helping her create one like this. i pinned yesterday from someone else's board without even knowing they were yours. nice work!!
ReplyDeleteThanks for the tutorial! The puppets look really lovely. I wish to make my first Waldorf style doll by following your tutorial.
ReplyDeleteCan I share your tutorial in my blog? Just by posting one of the photos and link to here.
¡¡Preciosos!!
ReplyDeleteMuchas gracias
¡¡Preciosos!!
ReplyDeleteMuchas gracias
These are SO wonderful! I can't wait to make one. I purchased a wool sweater at the thrift store today just for this purpose :)
ReplyDeleteThank you so much! I used the head idea for my school project and it turned out wonderful!
ReplyDeleteThank you so much for this post. I have been wanting to make marionette and glove puppets Waldorf style and have not found any books on the subject. I noticed you said you had lots of puppet making books in your library... what are they?? Thank you! I love your blog!
ReplyDeleteDear Brooke -- I wrote this post over 4 years ago, and since then I've reduced my collection significantly. I kept a number of photographic books on the history of puppetry, and as for books on puppet construction, my favorites are Making Puppets Come Alive by Larry Engler and Carol Fijan, Puppets and Puppet Making by David Currell, and Puppet Theatre by Maija Baric.
DeleteBest wishes,
mb
Ah, thank you so much!
Deletethank you soooo much, was like you searching and searching - and found you! I'll try it how you did it! greetings from Austria!
ReplyDeleteI love puppets and can't wait to try your instructions - your puppets are awesome! Greetings from Alabama!
ReplyDeleteThanks so much. I 've been looking for that kind of explanation for weeks ! It'll help me and I hope my grandchildren will like the puppets I'm going to make for Christmas holidays . Take care
ReplyDeleteYou went into such great detail for this tutorial. I am thinking I am going to do needle felting for the head and hands and then try to attach the head like you had said. Thank you for your post!
ReplyDelete